
Embroidery software
How do you turn a pet photo (or a portrait) into embroidery with AI?
A photo cannot be stitched as it is: first it has to become a few-color illustration, with no background and clear outlines. That is the job the AI does in seconds, instead of redrawing it by hand.
In Meus Bordados, you use Prepare with AI to redraw the photo and then Instant digitizing: illustration to create the stitch areas and the lines. In a few minutes the design is ready to check in 3D and download as DST, PES or JEF.
The AI does not replace your eye: the result stays editable, and it is worth reviewing size, colors and stitching order before going to the machine.
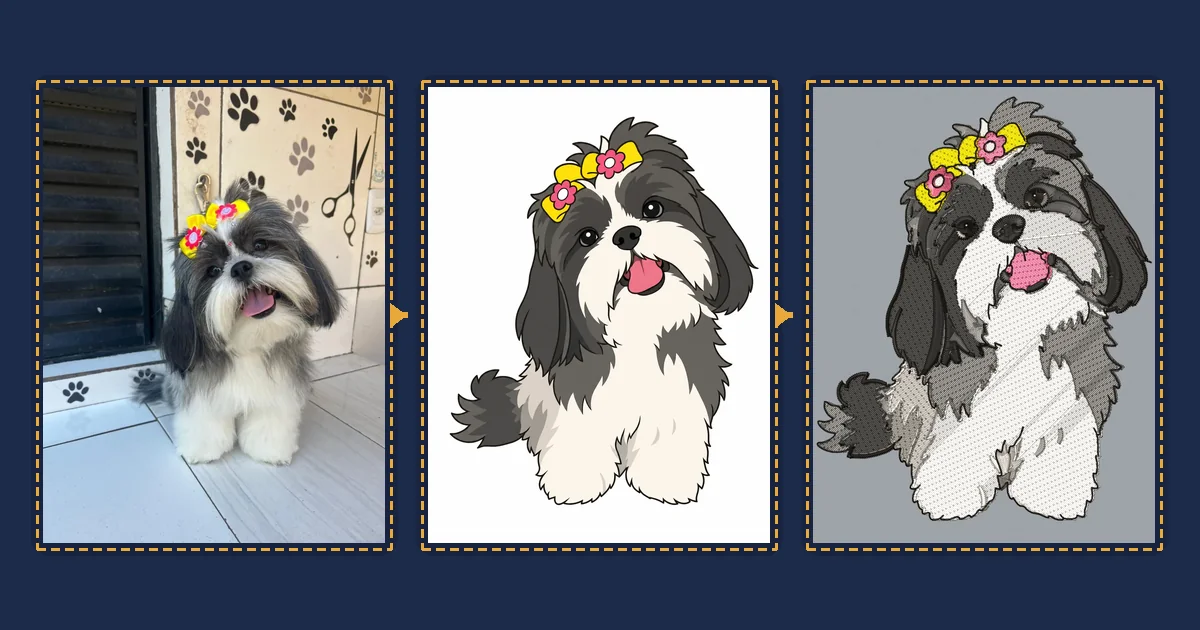
Why can’t a photo be stitched directly?
A photo has thousands of tones: every strand of fur, every shadow, the reflection in the eyes and the whole background. Embroidery software that tries to turn that into stitches, color by color, creates hundreds of loose specks, changes thread all the time and loses what matters, like the eyes and the nose. That is why photos sit at the bottom of the table in our guide on turning an image into an embroidery file.
Professional digitizers have always taken another route: redraw the photo as an illustration, with a few flat colors and outlines, and only then digitize it. That redraw used to take hours in a drawing program. The AI does the same job in less than a minute.
What does the AI do (and what doesn’t it do)?
In Prepare with AI, you send the photo and say whether it is a photo (pet, person, object) or a logo. The AI returns a new image with the background removed, 4 to 8 flat colors, dark outlines and simplified details, without losing what makes the customer recognize their pet: the color of the patches, the bow, the tongue sticking out.
With low-quality logos, it redraws the shapes with smooth edges and clean colors, keeping the text and the proportions.
What the AI does not do is digitizing: it delivers an image. The editor’s instant digitizing turns that image into stitches, and you can adjust everything. The image is generated by image models from OpenAI (ChatGPT) or Google (Gemini), depending on how the platform is set up.
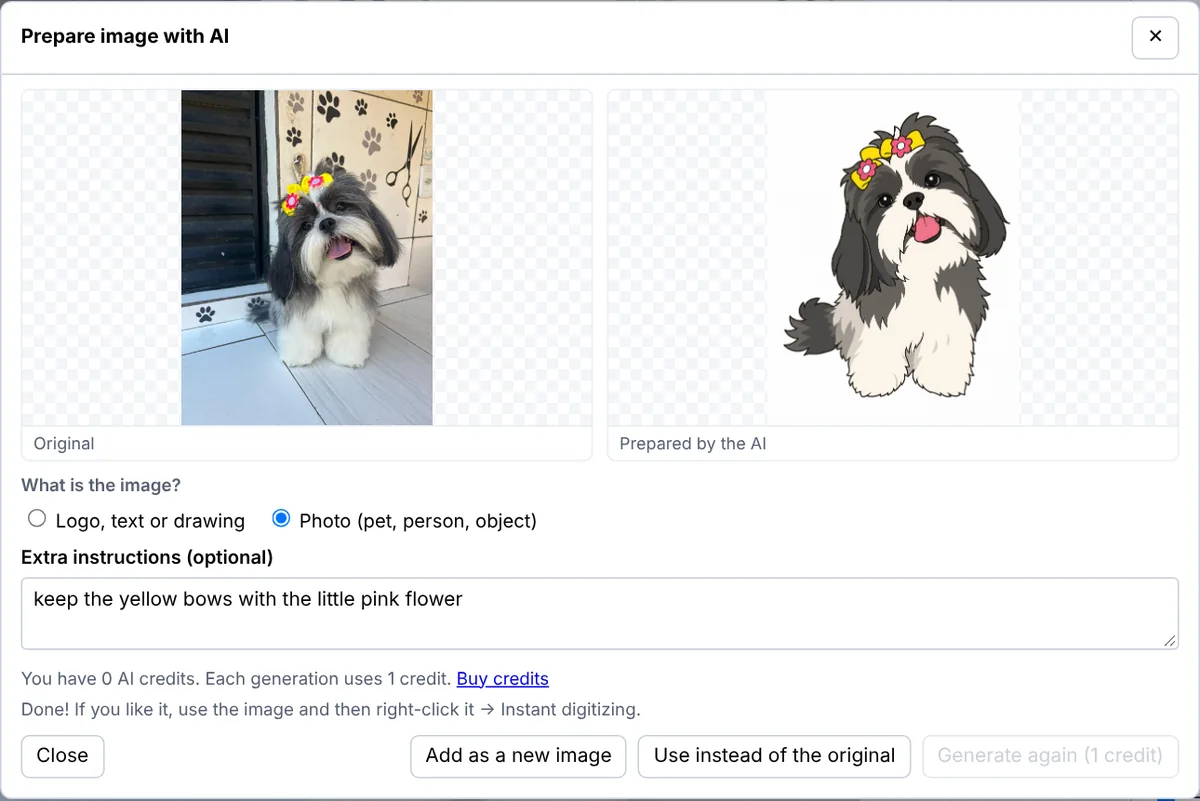
How do you turn the photo into embroidery in Meus Bordados?
- In the editor, click Add image… (or paste with Ctrl+V) and choose the photo your customer sent.
- Right-click the image and choose Prepare with AI….
- Select Photo (pet, person, object) and, if you like, write extra instructions such as “keep the yellow bows” or “at most 6 colors”.
- Click Generate (1 credit). It usually takes 20 seconds to 1 minute.
- If you like it, click Add as a new image (the original stays in the layers, hidden) or Use instead of the original. If not, adjust the instructions and generate again.
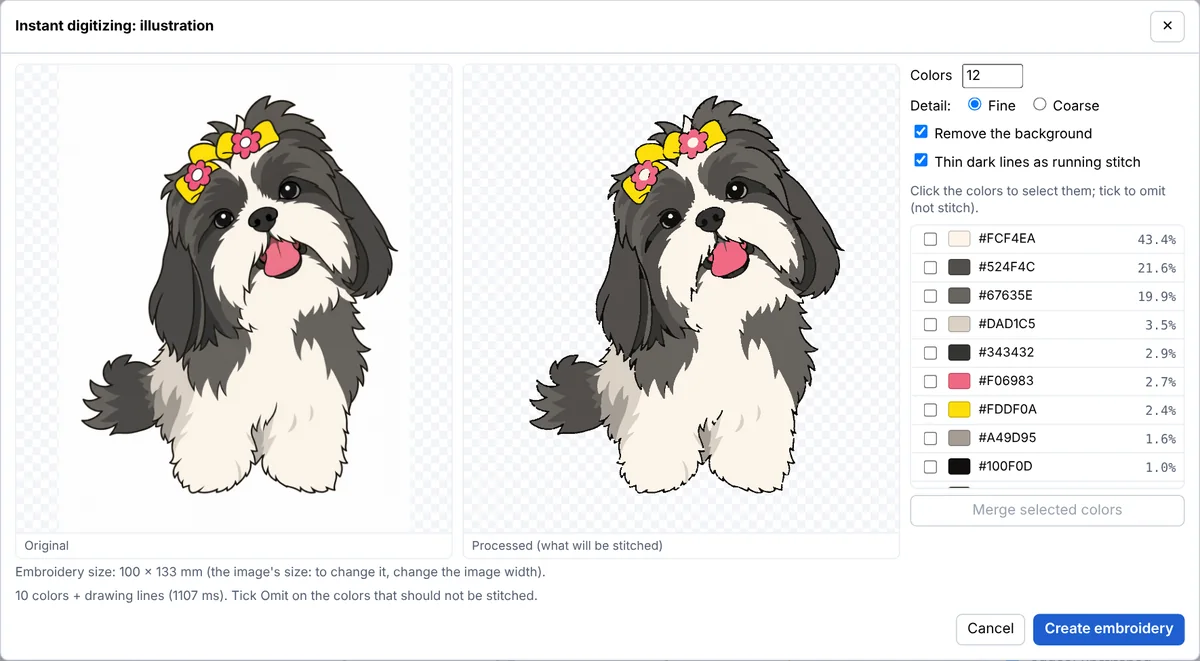
- Right-click the illustration and choose Instant digitizing: illustration….
- In the window, check the colors, merge the ones that are almost the same and tick Omit on the ones that should not be stitched. Then click Create embroidery.
- Check it in 3D, simulate the stitching and download it as DST, PES or JEF for your machine.
Tip: Before opening instant digitizing, set the image width to the final embroidery size: the small details are decided based on that size.
Logo or illustration: which instant digitizing should you use?
The editor has two instant digitizing modes, and both appear when you right-click the image and in the Draw menu.
| Instant digitizing: logo | Instant digitizing: illustration | |
|---|---|---|
| Best for | Logos, text and drawings with few colors | Illustrations, pets, people and photos already simplified by the AI |
| Colors | Up to 16, chosen automatically | 2 to 24, with a preview and the option to merge or omit colors |
| Light tones inside the figure | May be treated as background | Stitched (only what touches the image edge counts as background) |
| Dark drawing lines | Become thin satin areas | Become running stitch that follows the line |
| Small details (eyes, highlights) | Dropped below the minimum size | Kept from 0.3 mm² in Fine mode |
How do you write good instructions for the AI?
Extra instructions are optional, but they help a lot when you already know what the embroidery needs. Be direct and describe the result, not the process:
- “Keep the yellow bows with the little pink flower.”
- “At most 5 colors.”
- “Just the face, no body.”
- “White background and remove the collar.”
- “Thicker outlines, to stitch it small.”
- For logos: “keep the brand’s text and colors exactly”.
You can write in English, Portuguese or Spanish. If the result is not what you wanted, change one thing at a time and generate again.
Which photos give the best results?
- A single subject filling a good part of the photo: the pet, the person or the object.
- Good light, without strong backlight: you can see the eyes and the colors.
- Sharp focus, especially on the face.
- A simple background, if possible. The AI removes the background, but a clean one helps it tell fur from scenery.
- Phone photos work perfectly; you do not need a professional camera.
Watch out: Use photos your customer sent or authorized. Photos of people, above all, only with their consent.
How much does the AI cost?
Instant digitizing (logo and illustration) is part of every plan and can be used without limits.
Prepare with AI uses credits: each generated image uses 1 credit, and if the AI fails the credit comes back automatically. Credits are bought in packs in your dashboard, under AI credits, and they do not expire.
If you sell pet or portrait embroidery, it usually pays for itself on the first order: a redraw that would take an afternoon becomes a minute of work. See also how to price custom embroidery.
Frequently asked questions
Does the AI do the embroidery by itself?
No. The AI redraws the photo as an illustration; the editor’s instant digitizing turns the illustration into stitches. You check it in 3D and adjust whatever you want before downloading the file.
Does it work with photos of people?
Yes. Select “Photo” and, if you like, describe the framing in the instructions (for example, “just the face”). Use photos with the person’s permission.
Can I use an illustration I already have without spending credits?
Yes. If the image is already a drawing with few colors, go straight to Instant digitizing: illustration (or logo), which does not use credits.
What size works best?
For pets and portraits, from about 8 to 10 cm (3 to 4 in) wide the eyes and nose come out with detail. For smaller sizes, ask for fewer colors and thicker outlines in the instructions.
Which formats can I download?
DST, PES and JEF, the formats read by most home and industrial machines. See the differences in our guide to embroidery formats.
Related articles
- Files and digitizingHow do you convert an image or logo into an embroidery file?Step by step to turn a logo (PNG, JPG) into a stitch file: prepare the artwork, auto-digitize or digitize by hand, choose stitch types, review and export DST, PES or JEF. · 7 min read
- Embroidery techniqueSatin, fill or running stitch: which embroidery stitch type should you use?When to use satin stitch, fill (tatami) stitch and running stitch in machine embroidery, with recommended widths, density, underlay and pull compensation settings. · 6 min read
- Business and pricingHow much should you charge for custom embroidery? Formula and pricing tableHow to price custom embroidery: machine hour cost, thread and stabilizer, price per 1,000 stitches, digitizing fee, order minimums and margin, with a worked example. · 6 min read